I have a wall quilt in the pipeline and will post some details soon. It is to go with an existing quilt and they should work as a pair.
I will also be posting some images of bamboo tile bracelets soon (want to make a whole lot of these as gifts) and some twisted wire and feature bead pendants.
Look forward to spending some time crafting away. I am also creating an engagement album for my cousin, so will post some pictures of the finished pages soon.
Have a wonderful day and catch up soon!!!
Monday, May 31, 2010
Another stunning book I started in a class


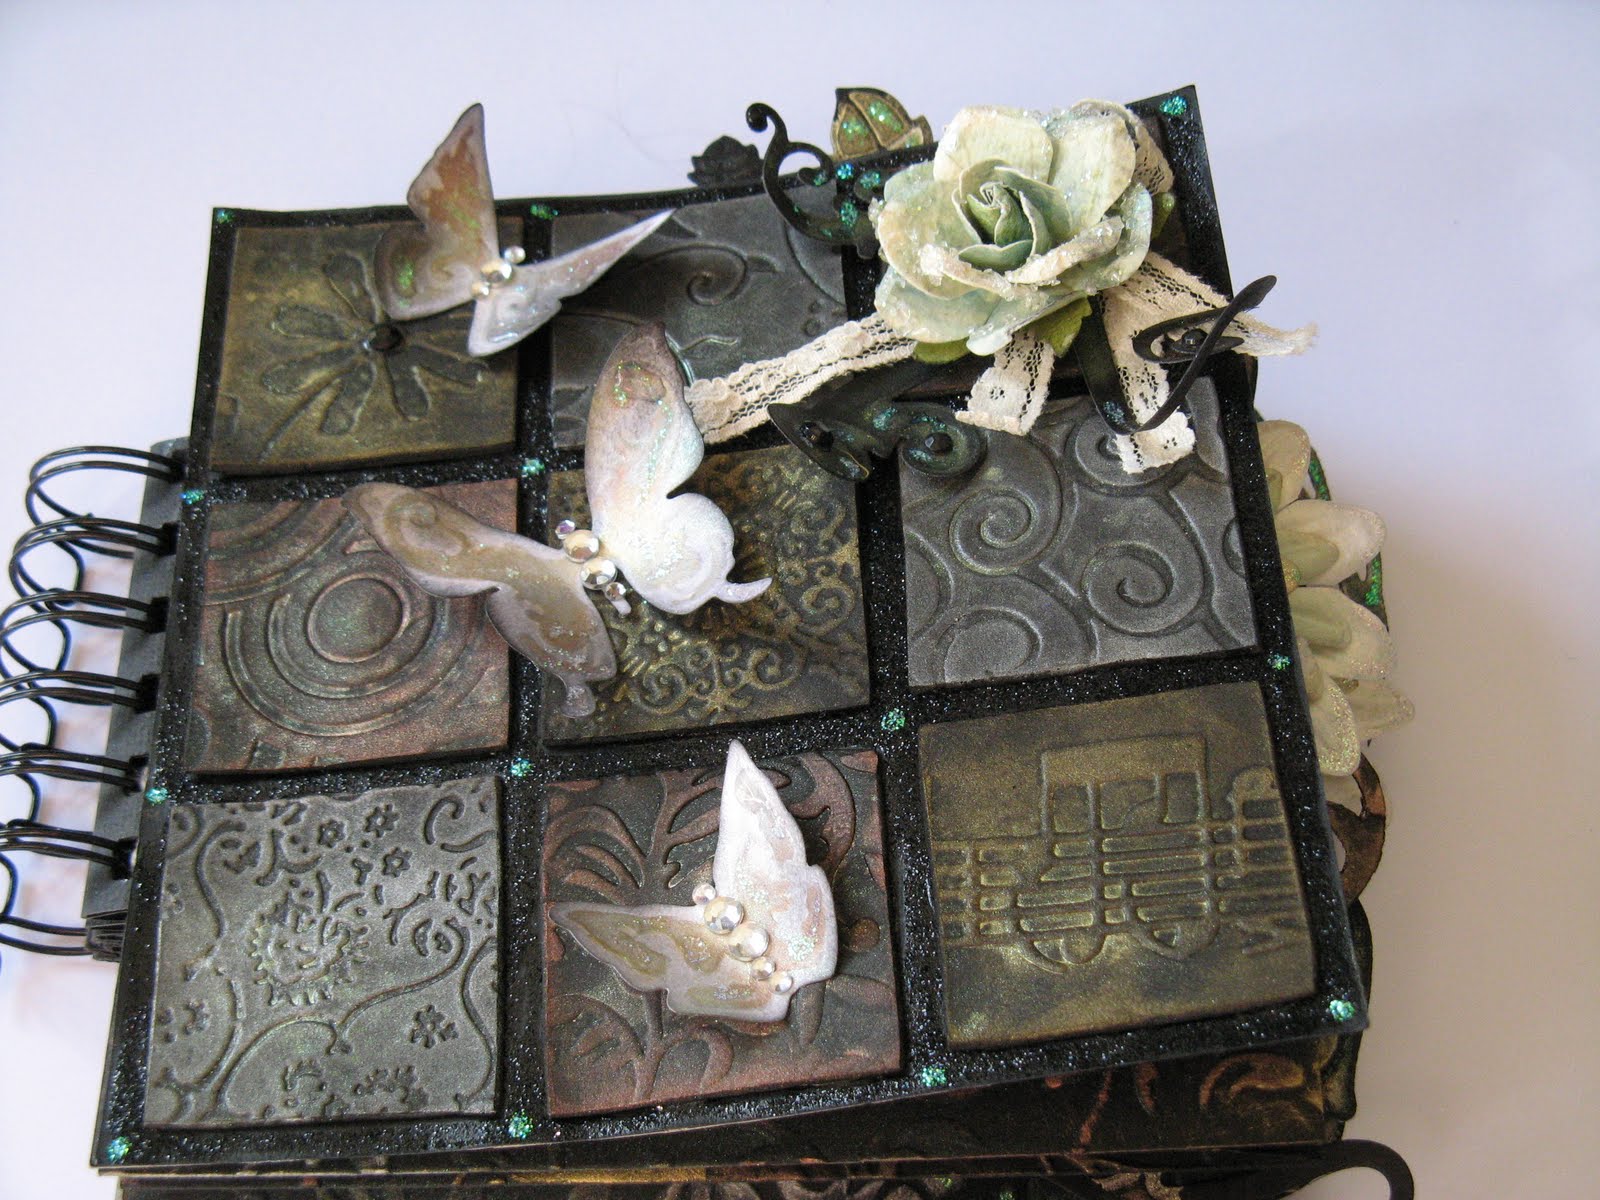
I made the cover in class for this stunning book. Wendy again inspired me and taught this amazing book cover. She did some pages, but the page colours did not appeal to me and I envisioned them for making another stunning project. I will post these when I finish this project. It is in a pack waiting for me to play with it. You will see my inspiration for my pages and how I changed them to match my colour selection and tie in with the cover.
I love the Prima Rose on the cover. The details are stunning. I used metallic powders and inks throughout the project, but the photo's do not pick up these details as the book really shimmers. I used a 12 x 12 sheet of DCWV card and cut this up and used the images to make the image really stunning. I used spellbinder and quickutz dies to cut the vines and embellishments.
I loved this project and think the book is stunning.
Bead necklace


I saw the most gorgeous necklace a friend had made. She had a stunning feature bead. It is golds and coppers with lampwork flowers. She matched this with swarovski crystals and did a multi strand necklace. Thank you so much Renchia for lending me your necklace to make my own and the amazing source of inspiration.
I found my own feature bead. I think it looks like a flower and is in shades of hot pink and red with some black lampwork details. I have mixed and matched some swarovski crystals to create the basis of my necklace. It is still in progress. I have also found a lovely green bead with olive flower details which I think would work well in this style too.
Sorry if the photo's are a bit blurred, I am saving up to replace my camera which does not like macro shots.
Gorgeous recipe book I made at a class


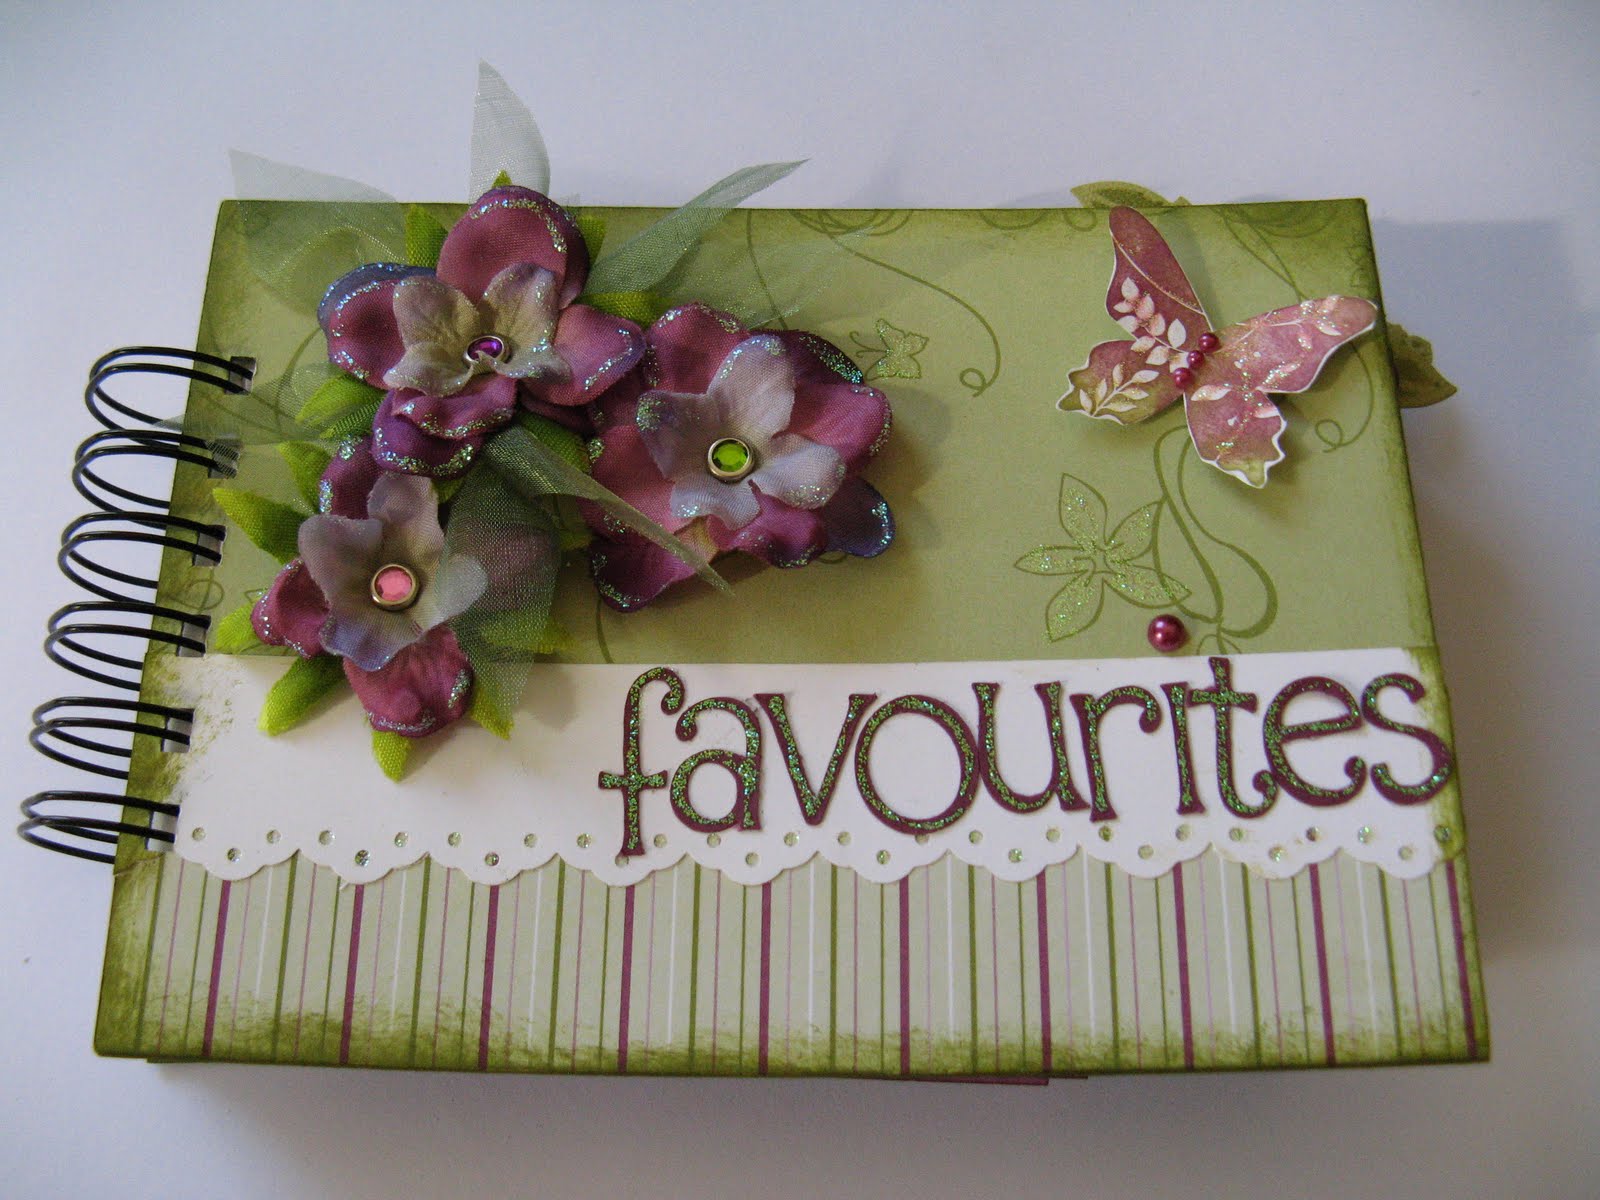
Thanks so much to Wendy who taught this fabulous class. I love my recipe book. It is with the Stampin Up Cottage Paper pack and using the Stampin Up recipe index card as well as the matching inks in Old Olive and Rich Razzleberry. Add some Cricut cut words in Rich Razzleberry Cardstock and some flowers and you have a stunning recipe book. Each card pulls out of a pocket.
I have a couple more projects to upload for May, so keep watching....
And some more...

This card is a cute fold. A friend showed it to me and I thought it would make a perfect birthday card for a girlfriend of mine.
I used a sheet of Martha Stewart Paper and folded it in half. I then folded each side in to the half way point. Next, I folded the corners in and then tucked the one side into the other side to make six pockets. I used the Spellbinders Die set Large Scalloped Circles and cut the opening as well as a few tags. I cut two small circle openings on the sides using the Spellbinders Die Set Large Circles. This is to make removing the tags easier.
I cut six tags out to fit the openings and embossed these using six diffent Cuttlebug folders. I used Swirls, Textile, Paisley, Stylized Flowers, Forest Branches and Victoria. I inked these with Wild Wasabi and Rich Razzleberry ink from Stampin Up. I also inked the wee card too.
I stamped several images. I used my Hero Arts Poetic Prints, Inkadinkado Stylized Flowers, Inkadinkado Garden Delights, Inkadinkado Setiments and Stampin Up Spots and Flowers with the Stampin up Rich Razzleberry and Wild Wasabi inks. I sponged some of the images and cut them out with the corresponding sized Spellbinder Circles and Scalloped Circles.
I then stuck them all together and found a piece of organza to match and tied the book together. I used a Kaiser Craft rubon in the inside page and embellished the pages with some Derivan Kindy Glitz. I added some Kaiser Flowers to the outside and used a brad to keep the flowers and ribbon together. I glued on some die cut leaves (from the Quickutz 2x2 vine leaf die)
If you want detailed instructions for the fold of this card, add a comment and I will post step by step instructions.
More May projects....


This project is a quick birthday card using the Stampin Up Inspired By Nature stamp set. I love the grass aspect of this stamp. I used the Stampin Up markers to colour the image and then stamped it. I spritz the paper with some ink and interference powder which looks like Glimmer Mist (but is heaps cheaper). You can't see it in the photos, but the image is all shimmery. I added some highlights with the pens and some Derivan Kindy Glitz. I had a napkin that had a cosmos image that matched the images so well and I pasted it with binder medium to a transperency sheet and trimmed it to size. I adhered this to the card with some dimensional foam.
Projects for May
.JPG)
.JPG)
.JPG)
.JPG)

And you thought I was being slack and had not been doing much other than studying? Hope you are all well and those of you in the Southern Hemisphere with me are all acclimitising to the cold. We had a really cold night last night and am rugged up warm with the fire going in the background.
This month I have not done much from an individual creative process, but I have been to quite a few inspirational classes and made some amazing projects and used the techniques and ideas to create some more projects.
I am still after eighteen months working on my Europe Trip album. I am slowly creating pages and will one day finish this album, but in no rush, I have a great slideshow presentation and was proudly showing this off to all and sundry, but will one day have a stunning art album with my photos, memorabilia and paper art. I love collecting all the booklets, brochures and pamphlets and adding them to my album, along with tags, receipts and tickets and this means that they are not lost or sitting in a box and never being looked at. For me, I love looking back at my albums and remembering the great time I had and the special memories the pictures of tickets evoke.
This is one of the layouts I have completed. I love the symmetry and geometry in the Eiffel Tower and decided I would try and capture some of this in my layout.
I used black 12 x 12 cardstock from Stampin Up. I then rolled silver Encore ink and the Stampin Up So Swirly roller on the background. I cut some Quickutz adhesive backed foil from the Quickutz Coutry Collection Paris - the Eiffel Tower and a Quickutz Border Die , I also cut the Spellbinder's Fleur De Lis Pendant from the foil. I used the Cuttlebug Harlequin Die and cut the flower shapes. I used Kaiser Craft paper flowers in black and white and cut the title from Storybook Cartridge for the Cricut. I used some Angelina Fibre and stamped the Hero Arts Poetic Prints (with black Stazon) onto the Angelina Fibre and cut the frames from Storybook as well. I inked the edges with Encore silver ink and added some fibres. The rose is from Stampin Up. I stamped an image of the Eiffel Tower onto cardstock and mounted that on the Spellbinders Pendant.
I hope you like it.
Subscribe to:
Comments (Atom)